The Designer's Asset Delivery Checklist: Every Format, Every Platform, Every Time
Stop guessing which file the developer needs. A systematic checklist for delivering design assets that land correctly — right format, right resolution, right name — without a back-and-forth.
In this article
Every design team has a version of the same conversation. The developer asks for the logo. The designer sends the Figma link. The developer exports it themselves at the wrong resolution, in the wrong format, without the right color space, and names it "logo-final-v3-USE THIS ONE.png." Two hours later, someone is wondering why the site looks slightly off.
Asset chaos is not a communication problem. It is a process problem. The fix is a delivery checklist that the designer runs once before handing anything over — a repeatable routine that produces the right file, right name, right format, every time.
Why Asset Chaos Happens
Design tools export for the designer's needs, not the developer's. Figma exports SVGs with editor metadata, invisible layers, and grouped elements that were sensible in the design but break in code. Illustrator saves EPS files that nothing outside of Adobe's ecosystem opens cleanly. Sketch exports 1× PNGs when the developer needed 2× and 3× for retina screens.
Beyond the tooling gap, there is a clarity gap. Most designers do not know what a developer does with an asset once it lands in the handoff folder. And most developers do not know enough about image formats to ask for the right thing. The result is a series of back-and-forth requests that both sides find tedious.
A delivery checklist collapses that gap. When you follow the same process every time, you stop having to make decisions on the fly, and the developer stops having to guess.
The Pre-Export Checklist: Format Decisions by Context
Before you export anything, answer three questions: Where will it live? What will render it? What are the constraints?
SVG — for icons, logos, and illustrations
Use SVG for any asset that needs to scale cleanly across device sizes or appear in code. Icons, logos, and geometric illustrations are all SVG candidates. The rule: if a developer will put it directly in an HTML or React file, or if it will appear at more than one size, SVG is almost always the right answer.
Before exporting SVG from Figma, flatten the element where sensible, remove hidden layers, and use "Outline stroke" on any stroked paths you want to behave predictably at different sizes. After export, run the file through an SVG optimizer — the Figma-exported version is typically 5–10× larger than it needs to be. Our SVG Optimizer strips the editor metadata, rounds decimal precision, and removes unused definitions in your browser with no upload required.
NoteA typical Figma-exported icon averages 12 KB before optimization and 1.5–2.5 KB after. At that ratio, running every SVG through an optimizer before delivery is not optional — it is the difference between a production-ready asset and a bloated one.
PNG — for UI assets with transparency
Use PNG when the asset has transparency and SVG is not appropriate (photorealistic renders, complex illustrations, screenshots). Export at 2× minimum for any asset that will appear on retina or high-DPI screens. A 1× PNG will look blurry on every modern phone and monitor.
WebP — for web photography and product images
Photographs, product shots, and any photorealistic image going onto a website should be WebP in 2026. Export from Figma as PNG first (to preserve maximum quality), then convert using our Image Converter. WebP lossy at quality 80 typically produces a file 25–35% smaller than the equivalent JPEG with no visible quality loss on screen.
JPEG — for email and legacy platforms
When the destination is an email newsletter, a legacy CMS that does not handle WebP, or a platform that explicitly requires JPEG, export as JPEG at quality 85. Do not re-compress a JPEG that has already been compressed — start from the PNG master every time.
PDF — for print and document assets
Print assets belong in PDF. Export at 300 DPI minimum. If the printer needs bleed, add 3mm of bleed around all edges and embed all fonts. Do not send a PDF intended for print and expect it to look good on screen without a separate screen-optimized version.
WarningNever deliver assets with spaces in filenames. Spaces get percent-encoded in URLs (%20), which breaks copy-pasted paths in code and causes 404 errors on case-sensitive Linux servers. Use hyphens, keep everything lowercase, and include the scale suffix on raster files.
Naming Conventions That Signal Professionalism
Bad filenames create ambiguity. Good filenames are self-documenting.
The pattern that works: [project]-[asset-name]-[variant]-[size].[extension]
Examples:
acme-logo-primary-light-bg-2x.svgdashboard-hero-dark-mode-1200w.webponboarding-illustration-step-3@2x.png
Rules that matter:
- No spaces. Use hyphens. Spaces in filenames create encoding issues in URLs and terminal commands.
- No version numbers in the filename. "final-v3-USE THIS ONE" belongs in version control, not the filename. If you need to distinguish versions, use a date:
acme-logo-2026-05-16.svg. - Always include the scale suffix for raster assets:
@1x,@2x,@3x. The developer should not have to open the file to know what they have. - Lowercase everything. Mixed-case filenames create platform-specific bugs on case-sensitive Linux servers.
Compression and Optimization Steps
After export and naming, run the optimization pass before delivery. This is not optional — it is the step that turns a design export into a production-ready asset.
For SVGs: Run through the SVG Optimizer. No exceptions. A Figma-exported icon that starts at 14KB often drops to 1.8KB after optimization. At that scale, the difference matters for page performance.
For PNGs: Use our Image Compressor to apply lossless PNG compression. For UI assets at 2×, you will typically save 15–30% with no quality loss. For photorealistic PNGs, consider converting to WebP instead — lossless WebP beats lossless PNG on size by 20–30%.
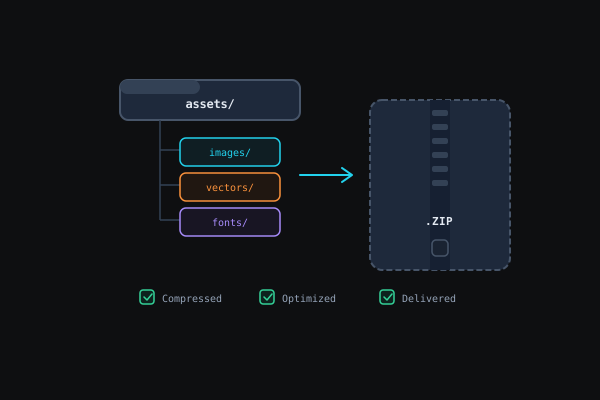
For large asset bundles: If you are delivering a set of assets — icons, a full illustration system, multiple hero images — zip them into a well-organized folder structure before handing off. A single zip is easier to receive, version, and unpack than fifteen loose files scattered across a Slack thread. Our Zip/Unzip tool handles this in the browser without installing anything.
Pro tipRun a quick sanity check before delivery. Open each asset in a browser tab (drag-and-drop a file onto Chrome or Firefox). If it looks right there, it will look right in production. SVGs with invisible layers or broken paths reveal themselves instantly this way.
A Delivery Checklist You Can Actually Use
Before sending any asset batch:
- Format correct? Match format to context: SVG for code, PNG for transparency, WebP for web photos, JPEG for email/legacy.
- Resolution correct? 2× minimum for all raster UI assets. 3× for assets that will appear in app icon sets.
- Filename follows the convention? No spaces, no version numbers, lowercase, scale suffix on raster files.
- SVGs optimized? Run through SVG Optimizer. Every time.
- Raster assets compressed? PNG lossless compression applied; photorealistic assets converted to WebP.
- Assets zipped if delivering more than five files? Organized folder structure, not a flat dump.
- Delivery note written? A two-sentence summary of what is in the handoff, where each asset goes, and any implementation notes saves the developer thirty minutes.
Takeaway
Asset delivery chaos is almost always process failure, not people failure. The same designer who sends confusing exports will send perfect ones with a checklist in front of them. Run the export, run the optimizer, name the file correctly, compress it, and write a delivery note. That is the full job. Build the checklist into your workflow once and you will spend far less time re-exporting files because the developer got the wrong one.